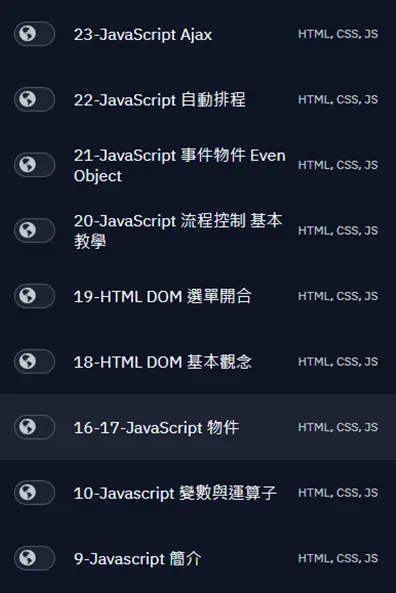
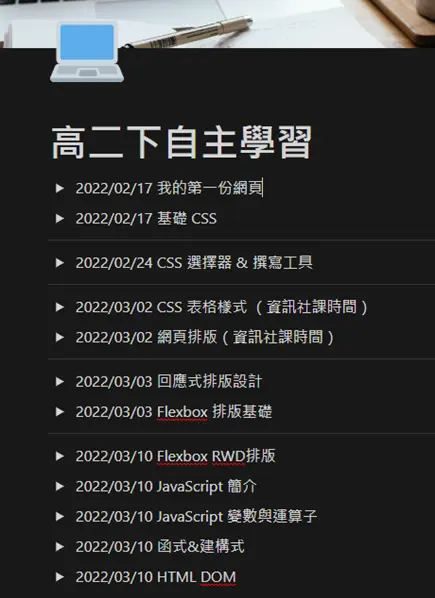
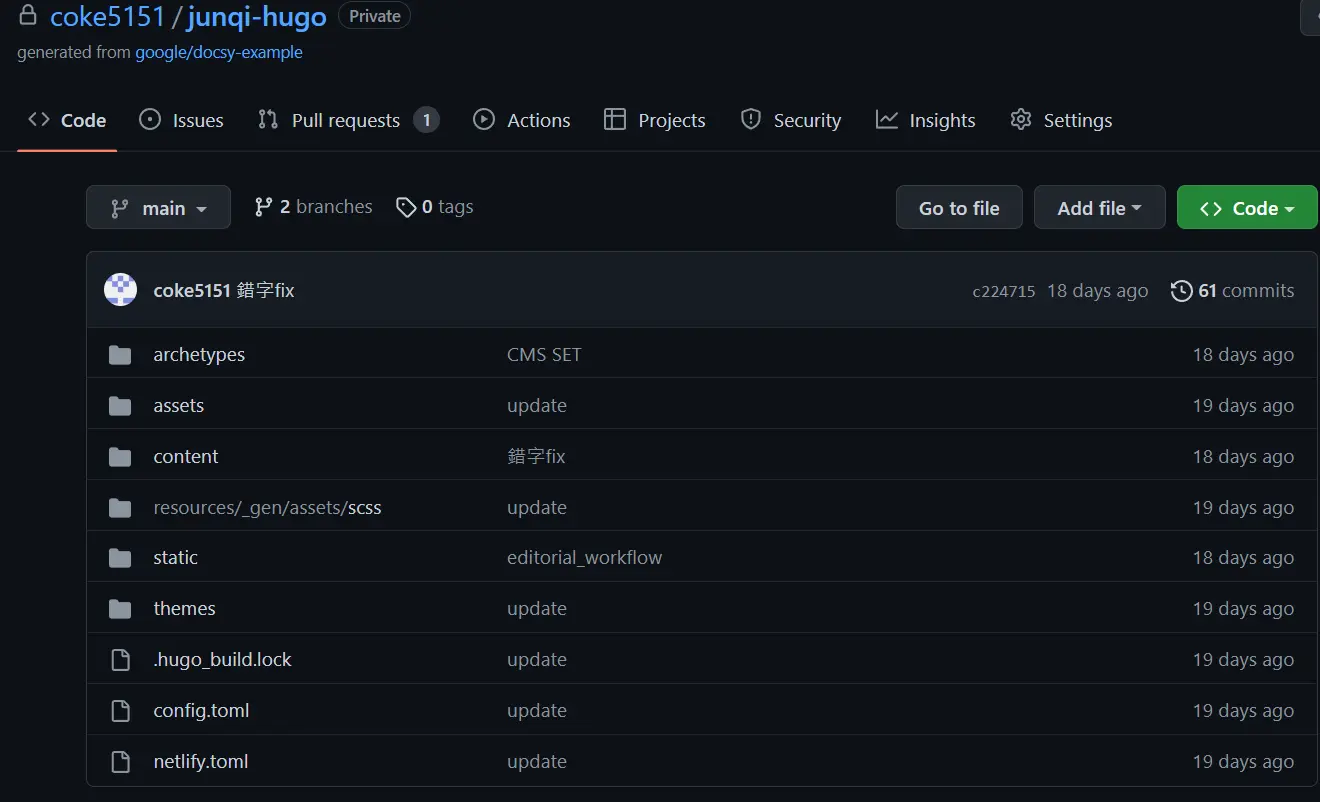
初探網頁設計
二年六班 侯竣奇
Contents
- 計劃
- 基礎中的基礎
- JavaScript
- 上架靜態伺服器
- 網域與 Nameserver
- 每次更新內容都需要這樣嗎?
- 初識 Hugo 靜態網頁生成
- 在 Netlify 上架
計劃
教材選用
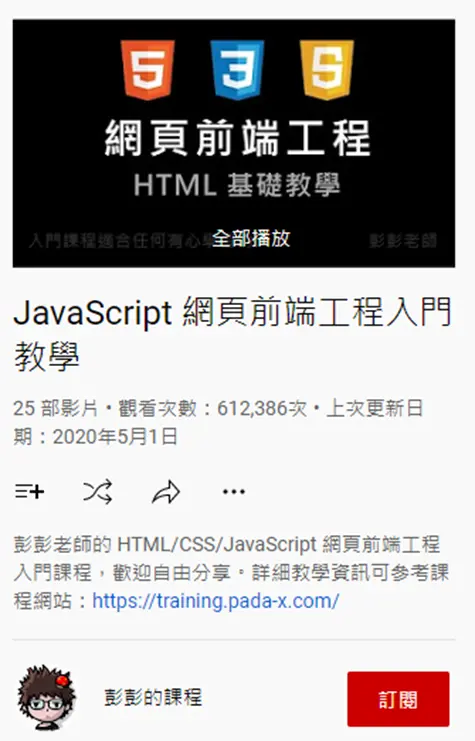
彭彭的教學頻道
| 1 |
基礎 HTML |
8 |
CSS3 Flexbox – RWD |
| 2 |
基礎 CSS |
9 |
JavaScript (JS) 入門 |
| 3 |
CSS 選擇器 |
10 |
JS 變數與運算子 |
| 4 |
CSS 表格樣式 |
11 |
JS 判斷式 |
| 5 |
基礎網頁排版 |
12 |
JS 迴圈 |
| 6 |
回應式排版設計 |
13 |
編寫網頁並上架 |
| 7 |
CSS3 Flexbox |
|
|
工具
基礎中的基礎
HTML 語法
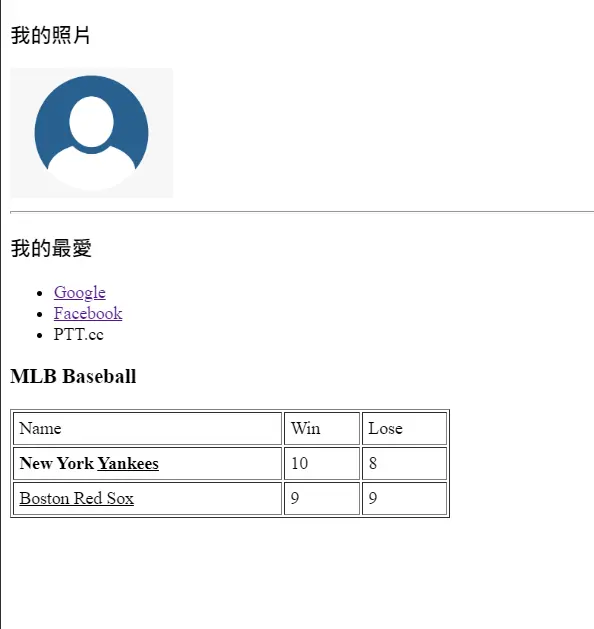
先認識最基本的網頁架構,在這個階段做出來的網頁只有最基礎的內容。
基本上就是跟著影片中的教學在 repl.it
上面把程式碼敲一遍,最後看瀏覽器渲染出來的結果。
 1
 2
 3
 4
 5
 6
 7
 8
 9
10
11
12
13
14
15
16
17
18
19
20
21
22
23
24
25
26
27
28
29
30
31
32
33
34
35
36
|
<!DOCTYPE html>
<html>
    <head>
        <meta charset="utf-8"></meta>
        <title>我的首頁</title>
    </head>
    <body>
        <h3>我的照片</h3>
        <img width="200" src="head.jpg"/>
        <hr/>
        <h3>我的最愛</h3>
        <ul>
            <li><a href="https://www.google.com">Google</a></li>
            <li>Facebook</li>
            <li>PTT.cc</li>
        </ul>
        <h3>MLB baseball</h3>
        <table border=1 width="400" cellpadding="5">
            <tr>
                <td>Name</td>
                <td>Win</td>
                <td>Lose</td>
            </tr>
            <tr>
                <td><b>New York Yankees</b></td>
                <td>10</td>
                <td>8</td>
            </tr>
            <tr>
                <td>Boston Red Sox</td>
                <td>9</td>
                <td>9</td>
            </tr>
        </table>
    </body>
</html>
|
CSS 語法
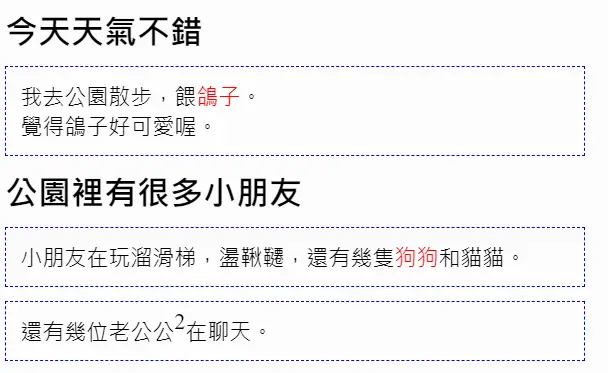
除了教學用途之外,基本上很少會看到「純的」html 網頁。CSS 可以幫助我們將網頁修飾得更為美觀,而且可以讓多個區塊套用相同的屬性,不僅避免多次的重複編寫還能讓格式更統一。
基礎 CSS
- class 選擇器
- 在
style 區塊或者獨立的 CSS 文件中使用 .xxx 代表指定特定的 class 名詞要使用的 css 效果
- 在
div、p 中可以使用 class="xxx" 來使整個區塊套用已經寫好的 css 語法
- id 選擇器
-
1
2
3
4
5
6
7
8
|
#btn{
 border:1px solid #888888;
 background-color:#ffffff;
 padding: 5px;
}

/* 套用在物件上 */
<button id="btn">我是要套用的按鈕</button>
|
- 虛擬選擇器:以
:focus 為例
-
1
2
3
|
input:focus{
 border:2px solid #ff0000;
}
|
- 當目標取得焦點(鍵盤或滑鼠)時套用此設定
- 階層式選擇
- CSS 可以指定「在 A 區塊中的 B」套用某組設定
-
1
2
3
|
.favorite h1{
 color:#0000ff;
}
|
 1
 2
 3
 4
 5
 6
 7
 8
 9
10
11
12
13
14
15
16
17
18
19
20
21
22
23
24
25
26
27
28
29
30
31
|
  <!DOCTYPE html>
    <html>
    <head>
        <meta charset="utf-8"/>
        <title>CSS 基礎語法</title>
        <style type="text/css">
        .title{font-weight:bold;font-size:24px}
        .content{width:400px;padding:10px;border:1px dashed blue;margin-top:10px;margin-bottom:10px}
        .keyword{color:red}
        .box{
            position:relative;left:200px;top:50px;
            width:100px;height:100px;background-color:green
        }
        </style>
    </head>
    <body>
        <div class="title">今天天氣不錯</div>
        <div class="content">
           我去公園散步,餵<span class="keyword">鴿子</span>。<br/>
           覺得鴿子好可愛喔。
        </div>

        <div class="title">公園裡有很多小朋友</div>
        <div class="content">
           小朋友在玩溜滑梯,盪鞦韆,還有幾隻<span class="keyword">狗狗</span>和貓貓。
        </div>
        <div class="content">
           還有幾位老公公<span style="position:relative;top:-8px">2</span>在聊天。
        </div>
    </body>
    </html>
|
CSS 表格
 1
 2
 3
 4
 5
 6
 7
 8
 9
10
11
12
13
14
15
16
17
18
19
20
21
22
23
24
25
26
27
28
29
30
31
32
33
34
35
36
37
38
39
40
41
42
43
44
45
46
47
48
|
<!DOCTYPE html>
<html>
<head>
<meta charset="utf-8" />
<title>CSS 表格樣式 - 詳細介紹</title>
<style type="text/css">
table{
	width:400px;
	border-collapse:collapse;
}
td{
	border-bottom:1px solid#888888;padding:10px;
}
/* 表格中的第一對 <tr> */
tr:nth-child(1){
	background-color:#7788aa;color:#ffffff;
}
/*表格中的偶數對 <tr> */
tr:nth-child(even){
	background-color:#e8e8e8;
}
</style>
</head>
<body>
	<table>
		<tr>
			<td>球隊</td>
			<td>勝</td>
			<td>敗</td>
		</tr>
		<tr>
			<td>紐約洋基隊</td>
			<td>10</td>
			<td>8</td>
		</tr>
		<tr>
			<td>波士頓紅襪隊</td>
			<td>9</td>
			<td>9</td>
		</tr>
		<tr>
			<td>多倫多藍鳥隊</td>
			<td>8</td>
			<td>9</td>
		</tr>
	</table>
</body>
</html>
|
Flexbox 排版
傳統 CSS 排版
- 讓
<div> 不換行
- 讓
<div> 置中
margin-left:auto; margin-right:auto;
- 讓
<div> 對母塊置中
- 調整行高
- 讓
<body> 與邊界沒有距離(網頁貼齊螢幕)
 1
 2
 3
 4
 5
 6
 7
 8
 9
10
11
12
13
14
15
16
17
18
19
20
21
22
23
24
25
26
27
28
29
30
31
32
33
34
35
36
37
38
39
40
41
42
43
44
45
46
47
48
49
|
<!DOCTYPE html>
<html>
<head>
	<meta charset="utf-8" />
	<title>竣奇的自我介紹</title>
	<style type="text/css">
	.head{
		background-color:#003344;color:white;
		font-weight:bold;font-size:30px;
		text-align:center;padding:10px
	}
	.content{
		width:1000px;
		margin-left:auto;margin-right:auto;
	}
	.box{
		width:280px;padding:10px;margin:10px;
		background-color:white;
		display:inline-block;vertical-align:top;
		text-align:center;height:150px;line-height:30px;
	}
	.title{
		font-weight:bold;
	}
	</style>
</head>
<body style="margin:0px;background-color:#eeeeee;">
	<div class="head">竣奇的自我介紹</div>
	<div class="content">
		<div class="box">
			<div class="title">我的基本資料</div>
			<div>姓名:侯竣奇</div>
			<div>2004 年生</div>
		</div>
		<div class="box">
			<div class="title">我的個人興趣</div>
			<div>寫程式</div>
			<div>金融交易</div>
			<div>研究生產力工具</div>
		</div>
		<div class="box">
			<div class="title">學經歷</div>
			<div>嘉義高中</div>
			<div>南興國中</div>
			<div>興安國小</div>
		</div>
	</div>
</body>
</html>
|

Flexbox 排版
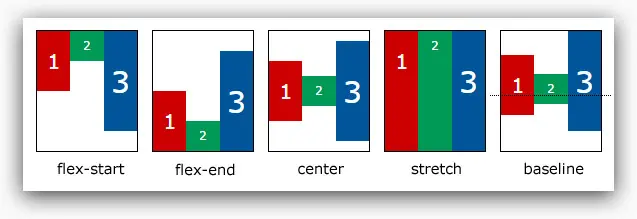
什麼是 Flexbox?
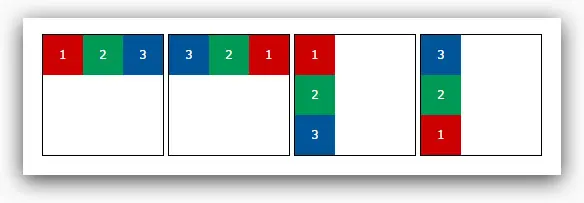
Flex 是 CSS3 開始出現的 box model。它就像一個一個靈活的盒子,可以藉由設定盒子的內容物如何排列來控制網頁中的內容
- justify-content
- 內容與整個 Flexbox 的「水平對齊」
- flex-start
- flex-end
- center
- space-between
- space-around
- align-items
- 內容與整個 Flexbox 的「垂直對齊」
- flex-start
- flex-end
- center
- stretch:預設值,將內容元素全部撐得和 Flexbox 一樣高
- baseline 以所有內容的基線作為對齊標準
-
 1
 2
 3
 4
 5
 6
 7
 8
 9
10
11
12
13
14
15
16
17
18
19
20
21
22
|
<!DOCTYPE html>
<html>
<head>
	<meta charset="utf-8" />
	<title>CSS3 Flexbox</title>
	<link href="style.css" rel="stylesheet" type="text/css"
			media="all" />
</head>
<body>
	<nav>
		<div class="logo">Logo</div>
		<div class="menu">Menu</div>
		<div class="user">User</div>
	</nav>
	<!-- Flex 如何解決:並排(切欄)、水平對齊、垂直對齊的問題 -->
	<main>
		<div class="item">News 1<br/>Today is a good day.</div>
		<div class="item">News 2</div>
		<div class="item">News 3</div>
	</main>
</body>
</html>
|

RWD
RWD:Responsive Web Design
自適應排版
✩ 依照使用者的螢幕大小(1200px/500px/…)規畫不同的 CSS 設定
HTML:
 1
 2
 3
 4
 5
 6
 7
 8
 9
10
11
12
13
14
15
16
17
18
19
20
21
22
23
24
25
26
27
28
29
30
31
32
|
<!DOCTYPE html>
<html>
<head>
	<meta charset="utf-8" />
	<title>CSS3 Flexbox RWD 排版</title>
	<link href="style.css" rel="stylesheet" type="text/css"
			media="all" />
</head>
<body>
	<nav>
		<div class="logo">Logo</div>
		<div class="menu">Menu</div>
		<div class="user">User</div>
	</nav>
	<!--
		RWD 回應式設計的關鍵動作:欄位變化
		Flex 如何控制欄位的變化?
		例如:4欄 > 2欄 > 1欄

		規劃:
			1200px 以上的規劃:4 欄,固定尺寸
			500px~1200px 的規劃:2 欄,彈性尺寸
			500px 以下的規劃:1 欄,彈性尺寸
	-->
	<main>
		<div class="item">News 1<br/>Today is a good day.</div>
		<div class="item">News 2</div>
		<div class="item">News 3</div>
		<div class="item">News 4</div>
	</main>
</body>
</html>
|
 1
 2
 3
 4
 5
 6
 7
 8
 9
10
11
12
13
14
15
16
17
18
19
20
21
22
23
24
25
26
27
28
29
30
31
32
33
34
35
36
37
38
39
40
41
|
body{margin:0px;}
/* nav 樣式設定 */
nav{
	display:flex;
}
nav>.logo{
	/* 沒有彈性,固定尺寸 */
	flex:none;width:100px;
	background-color:#ffcccc;
}
nav>.menu{
	/* 盡量把容器的空間張滿 */
	flex:auto;
	background-color:#ccccff;
}
nav>.user{
	flex:none;width:100px;
	background-color:#ccffcc;
}
/* main 樣式設定 */
main{ /* 容器 */
	display:flex;flex-wrap:wrap;
	justify-content:center;
	align-items:flex-start;
	background-color:#cccccc;
}
main>.item{ /* 項目 */
	flex:none;
	width:270px;margin:10px;
	background-color:#ffcccc;
}
@media (max-width:1200px){
	main>.item{
		width:45%;
	}
}
@media (max-width:500px){
	main>.item{
		width:90%;
	}
}
|
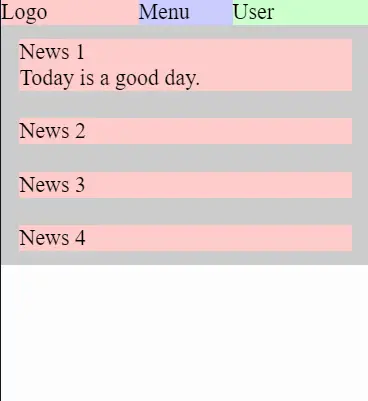
- Desktop:

- Phone:
JavaScript
基礎語法
與 C++ 相似處:
- 都須以 ; 結尾
- 都區分大小寫
- 變數觀念似乎相似
1
2
3
4
5
|
//在 head 裡面可以寫 JS
<script type="text/javascript">
		alert("大家好");
		alert("大家午安");
</script>
|
事件處理
 1
 2
 3
 4
 5
 6
 7
 8
 9
10
11
12
13
14
15
16
17
18
19
20
|
<!DOCTYPE html>
<html>
	<head>
		<meta charset="utf-8"/>
		<title>Event 事件處裡</title>
		<script type="text/javascript">
			function over(element){
				element.style.color="red";
			}
			function out(element){
				element.style.color="black";
			}
		</script>
	</head>
	<body>
		<button onclick="alert('Clicked')">Click</button>
		<span onmouseover="over(this);" onmouseout="out(this);">Test</span>
		<div onmouseover="over(this);" onmouseout="out(this);">Line2</div>
	</body>
</html>
|
神奇的語法問題
1
2
3
4
5
|
//第一種寫法:執行後倒數計時器馬上就歸零了
window.setTimeout(countdown(),1000);

//後來試著跟著影片裡寫,這樣子居然就可以了
window.setTimeout(countdown,1000);
|
有誰知道為什麼嗎?
資料:
查詢到的方法
- 手寫 JavaScript
- 利用 JQuery
其中第一種方法我嘗試失敗,後來改用第二種。
其實我第二種一開始也失敗,因為竟然不知道 JQuery 裡面的語法不是內建的,要先下載下來引用…
 1
 2
 3
 4
 5
 6
 7
 8
 9
10
11
12
13
14
15
16
17
18
19
20
21
|
<!DOCTYPE html>
<html>
    <head>
        <meta charset="utf-8"/>
        <title>樹(いつき)的金融學堂</title>
        <link rel="icon" href="/favicon.svg" type="image/x-icon" />
        <link rel="stylesheet" href="main.css" />
        <script src="jquery-3.6.0.min.js"></script>
    </head>
    <body>
        <script type="text/javascript" src="/main.js"></script>

        <div class="header"></div>
        <script>$(".header").load("header.html");</script>

        <main>
            <H1>HOMEPAGE</H1>
        </main>
    </body>
</html>
|
然後在目錄放一個叫 header.html 的檔案,裡面只需要寫 Menu 的區塊就好了(不用寫完整的 html 檔)
上架靜態伺服器
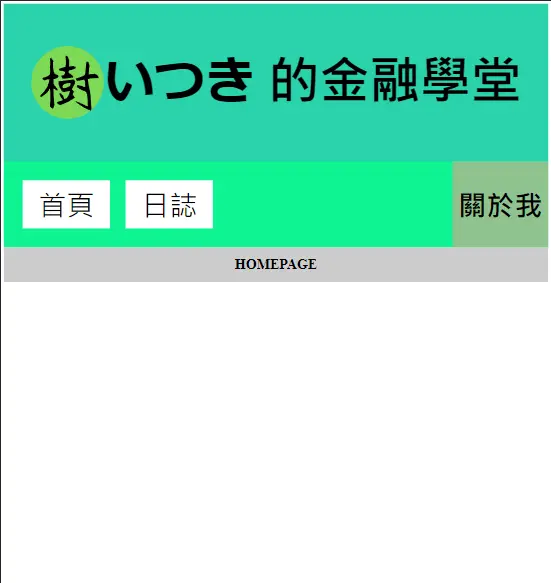
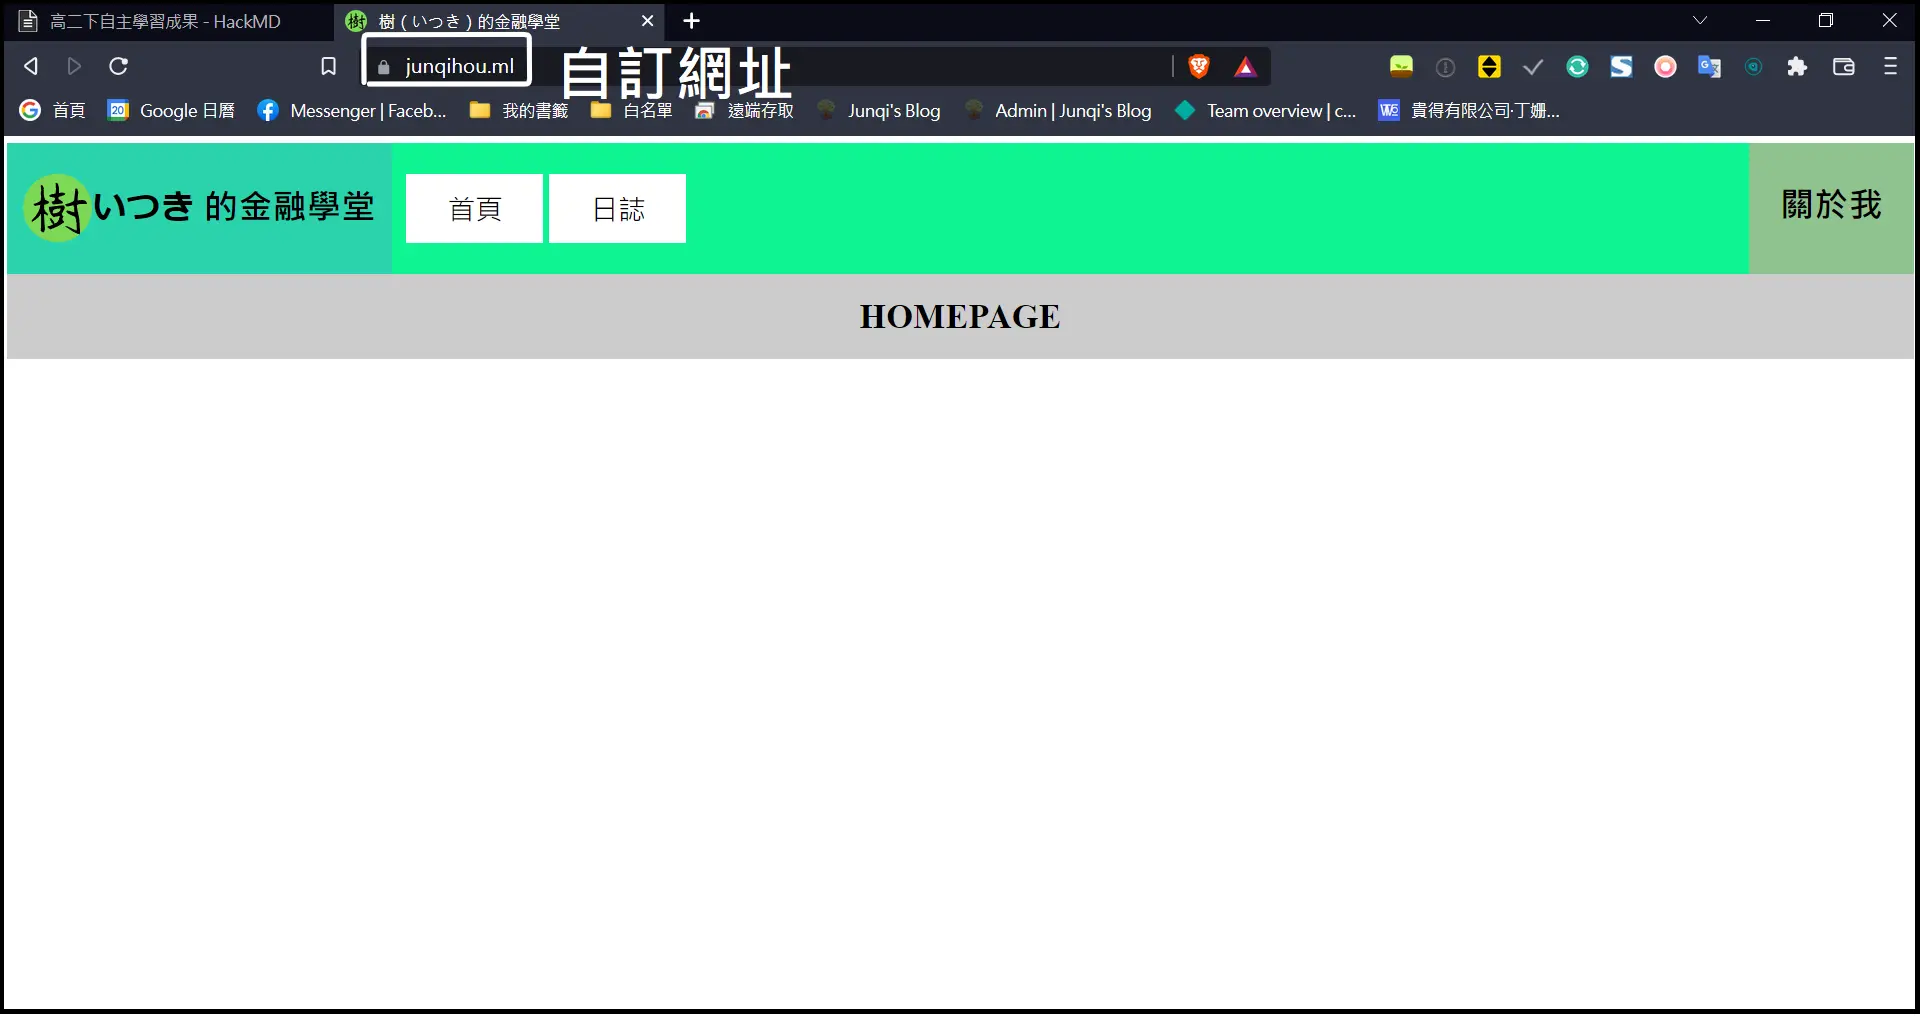
做到此時網頁的樣子:
- 花了很多時間才完成的 RWD Menu
-
沒錯,我花了好久才弄好 Menu,而且其實比例好像有哪裡怪怪的。

Github
別管那麼多,先上架就對了!
資料:


網域與 Nameserver
源由
- Github 可以自訂網域
.com、.net 等大部分頂級網域需要花錢- 不想用次級網域 eg.
junqi.github.io
資料:
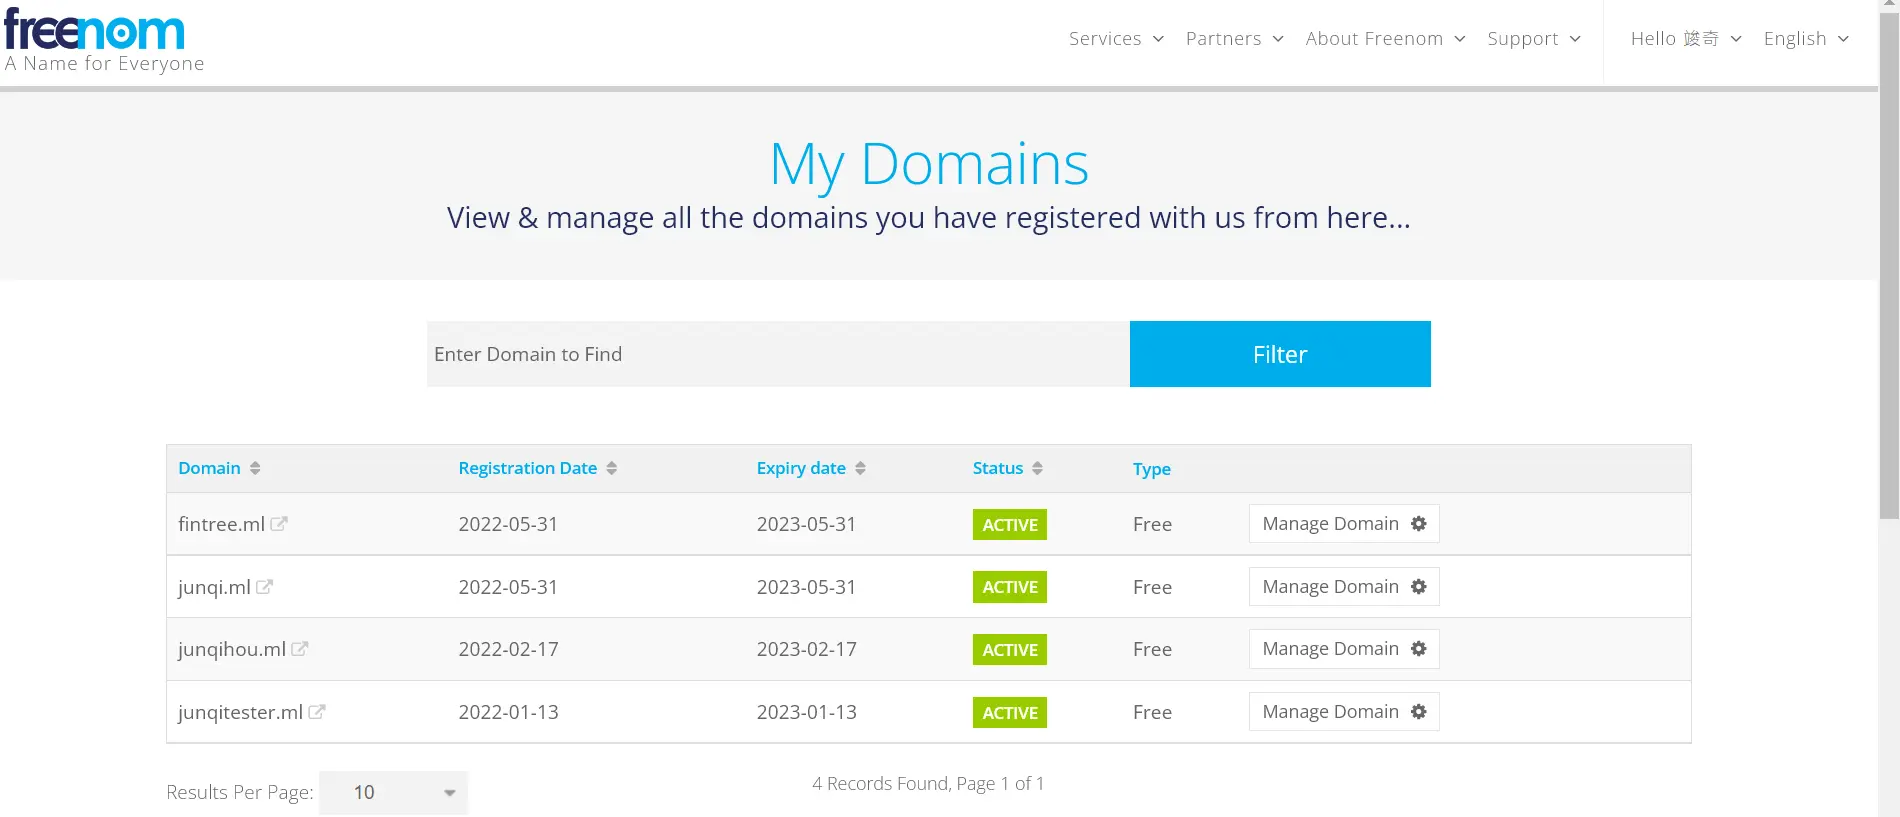
Freenom
- 提供
.tk、.ml、.ga 等免費頂級網域
- 把 DNS 指向 Github 伺服器
小結
每次更新內容都需要這樣嗎?
根據原訂的計畫,到了這一步以後應該就是開始寫一些網頁的內容豐富我的網站。但是突然想到幾個問題點:
- 每次一需要修訂內容就需要動到網頁原始碼。
- 對於寫文章來說,每一行都動到 HTML 原碼並不是一個很順暢的書寫體驗。
於是乎想到我現在正在用來記錄學習過程的 Notion 似乎也支援分享為網頁的功能,後來深入找尋資料發現 Markdown 語法似乎天生就可以轉成 HTML…
Markdown 語法
最初接觸
Notion:支援 Markdown 的線上多功能筆記軟體
從這個學期初開始,我為了方便記錄我的學習內容,一直都是使用 Notion 作為記錄的工具。
在 Notion 中許多常用的語法,其實都是 Markdown 語法:
# 標題
## 次標題### 次次標題
…以此類推,最高支援六層
[文字](URL) 超連結`code` 程式碼引用
Markdown 特性
由於 Markdown(下稱 MD)在最終顯示時會被轉換成 HTML,當 MD 語法無法滿足你需求的時候,其實可以直接在檔案中寫上 HTML 碼,最終顯示出來是不會有問題的。
認識 Hugo
前言
資料:
最後我選用 Hugo 當靜態網頁生成器。
Why Hugo?
What’s Hugo?
Hexo 與 Hugo 都是靜態網頁生成器,只要給它們 Markdwon 文件就可以自動依據你給的模版產生出網頁。
我選用 Hugo 主要有以下原因:
- 開源免費。
- 極快的網頁生成速度,既使文章數量多起來也不必擔心。
- 支援 Markdown 語法,方便更新文章。
Code Notes:
1
2
3
|
hugo new site xxx //建立一個網站
hugo new posts/xx.md //建立一個新文章
hugo server -D //在本機架預覽伺服器
|
選擇模版
- LoveIt
- KaTeX 語法
- 例:等差級數和公式
$\sum_{i=1}^{n}{a_i}=\frac{(a_1+a_n)*n}{2}$- $\sum_{i=1}^{n}{a_i}=\frac{(a_1+a_n)*n}{2}$
- 黑色模式
- 程式碼高亮
- RWD
- 簡潔美觀
設定 config.toml
設定 Menu 的項目、網站的 icon、等等

在 Netlify 上架
部屬
Netlify 提供免費的靜態伺服器,並且支援 Automatic Deploy,可以在你把更新的文章 push 到 Github 上面以後自動更新文章到網頁上。
- Github 作為源碼儲存庫
- Netlify 發現有變動後自動
Deploy
Netlify CMS:靜態網站的後台系統
建立
CMS:Content Management System(內容管理系統)
設定後台可以管理的項目(標題、內文、日期、分類等…)

(對應的設定介面)

最終成果
本站網址:junqi.ml
2023/07/11 更:現為 blog.junqi.tw
文章管理流程:
- 在 CMS 上面新增文章
- 從 HackMD 上面
Pull 下來修改內文
- 從 HackMD 寫好後
Push 回 Github
- 在 CMS 上「發文」,合併分支及
Deploy 的部分會全自動處理


心得
與上學期的差異
我上學期的自主學習的主題是「自學 MT5 程式交易」,起初我也有個宏大的目標:希望能夠寫出一些市場上流傳常見的策略,利用歷史資料一一驗證它們在這些年的績效表現並做數據分析。
但到了後來頻繁出現的編譯錯誤,又加上不是常見的程式語言以至無從問起,經過好幾週的重寫與測試後我還是放棄了…又或者說是放到以後待完成的願望清單。
這學期我將目標放得更鬆,為了讓我學習過程中即使遇到障礙也較容易尋找協助,我把主題定在較常見的網頁設計。我最低的目標是:學習基礎的語法、了解網頁的構成。
雖然最終我沒有硬生生把整個網頁手刻出來,但在把預計的教材學習完並且初步寫出 Menu 後,我透過修改模版、結合架站時學到的網域概念,最終生出了本站。
未來展望
今後在學習的過程中會順手把歷程在這裡,除了作為自己的學習記錄,也希望今後若有人遇到與我相同問題時,我能幫上忙。


 Junqi's Blog